
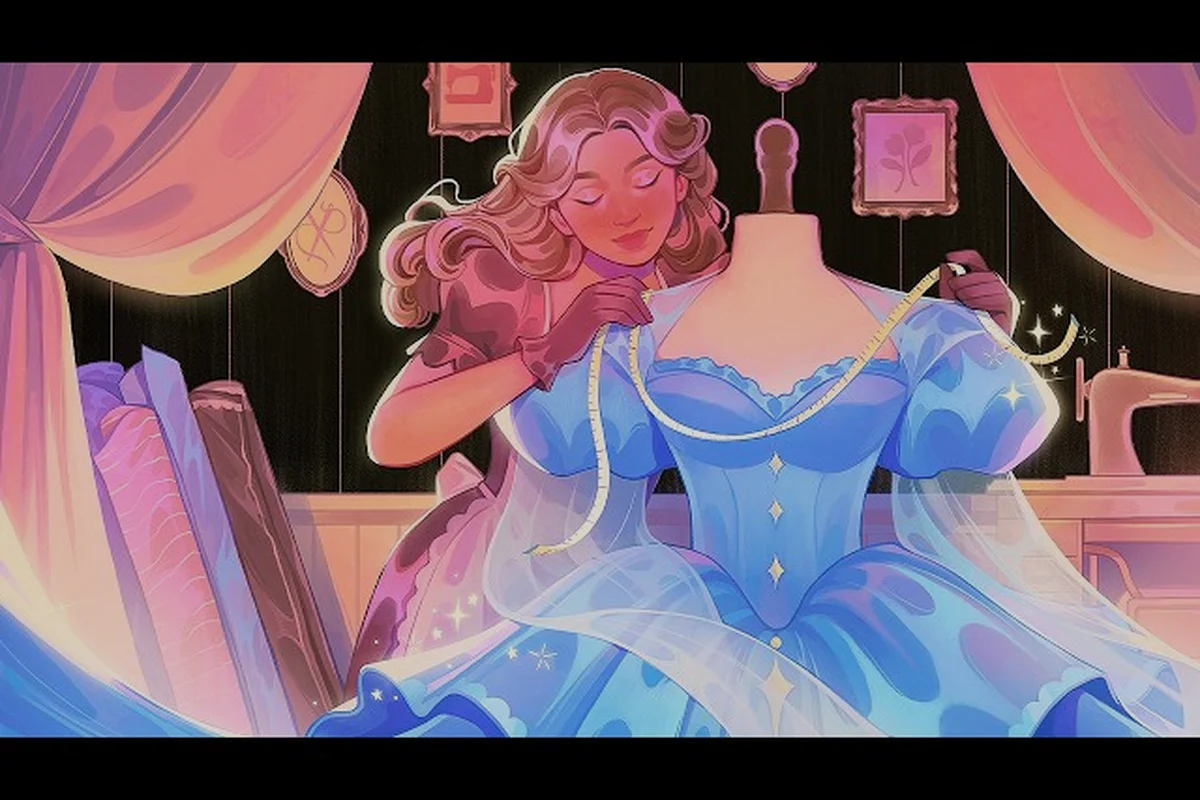
Cutting a clean gown in Dressmaker comes down to three habits: reading the paper pattern template before you touch the scissors, aligning every piece to the correct grain line, and arranging the cut so leftover fabric stays usable for the next commission. Players who skip any of those steps usually end up re-cutting a panel or scrapping an entire order, which is why so many early commissions feel punishing even though the game markets itself as cozy.
This Dressmaker pattern guide walks through the full cutting loop, from the moment the request brief appears on your workbench to the final piece sliding off the mat. The Steam store page describes the loop as designing in the sketchbook, arranging the paper pattern, previewing on a mannequin, and then sewing, and our own testing confirms that the paper pattern stage is where most wasted fabric and lost reputation points originate. By the end of this walkthrough you will know how to read every marker on a pattern template, what grain direction each piece actually requires, and how to lay out a multi-panel gown without orphaning scraps.
Reading the Pattern Template Before You Cut
A pattern template in Dressmaker is a labeled stencil of paper that snaps onto the cutting mat. Every template carries three pieces of information you cannot afford to ignore: the body measurements it expects, a directional arrow showing grain orientation, and dashed lines for seam allowance that mark where the scissors must stop. Skipping the labels is the fastest way to sew a panel that refuses to lie flat on the mannequin.
What the Labeled Arrows Actually Mean
The arrows printed on each pattern template are not decorative. They point along the lengthwise grain, which is the strongest direction of the fabric and the one that controls how the finished dress hangs. A crosswise grain arrow runs perpendicular to the lengthwise one, and a bias arrow runs diagonally at 45 degrees. Each piece in a gown expects a specific grain because fabric stretches differently along each axis; place a sleeve on the bias and you will fight it through every pass of the sewing machine.
Why Grain Direction Changes the Final Garment
When the pattern is laid along the lengthwise grain, the dress holds its shape, seams stay pressed, and hems hang evenly. Cross-grain placement gives a softer drape that works well for skirts and flowy evening wear, while bias placement produces the fluid, sculpted look of formal gowns but eats more fabric. Players who ignore grain direction often report a panel that twists on the mannequin or a neckline that puckers after sewing, and both symptoms trace back to the same root cause: the template arrow was rotated away from the fabric's actual weave.
The Three Markers You Should Check First
Before picking up the scissors, hover the paper template over the cutting mat and confirm three things in this exact order: the grain arrow runs parallel to the selvage of your fashion fabric, the printed size marker matches the customer's body measurement brief, and the dashed seam allowance line sits fully outside every cutting boundary. A single misread grain line on a cotton-linen blouse, for example, can twist the side seam by 3–4 cm after the first wash because the warp and weft shrink at different rates — and unlike a crooked hem, that distortion cannot be fixed without recutting the panel. Doing this template-stage verification costs roughly ten seconds per pattern piece, while recutting even one bodice front can waste over 0.5 m of 45-inch-wide fabric on a standard size 10 layout. Treat the check as a paid insurance premium against the most common dressmaker pattern layout failures, not as optional homework.
| Check | What to Look For | Why It Matters |
|---|---|---|
| Grain arrow | Arrow pointing parallel to the fabric selvage | Wrong orientation = twisted seams |
| Size marker | Body measurement tag matching the customer's brief | Mismatched size = redo the whole panel |
| Seam allowance | Dashed line at the edge of every piece | Cutting inside the line removes fit tolerance |
Players who treat this three-step check as a hard rule rarely waste a panel, because most cutting mistakes are caught at the template stage when they still cost zero fabric. If you want a deeper walkthrough of the cutting mat itself, the pattern pieces breakdown covers how the grid anchors every cut you make.
How to Cut Patterns Once the Template Is Set
Cutting in Dressmaker is closer to tracing than chopping. The scissors follow a path you draw, and the engine checks each path against the template before committing the cut. That gives you a forgiving window to fix a stray line, but it also means sloppy tracing shows up immediately as a red outline around the panel.
A Five-Step Cutting Workflow
The fastest way to get a clean panel is to slow down on the first pass and speed up on the second — a two-speed rhythm that mirrors how the in-game scissors tool tracks your cursor velocity against the seam allowance tolerance. On the first pass, dropping below roughly 40% cursor speed keeps the blade locked to the traced line, which prevents the jagged aliasing that triggers the red error flash and forces a redo. Once the outline is committed, lifting the scissors and re-entering at 70-80% speed for the cleanup pass trims the residual nicks without dragging the blade off-grain, preserving the grain line alignment that your pattern layout depends on for proper draping.
-
Snap the template to the cutting mat in the orientation that matches its grain arrow.
-
Trace the outline with a slow, continuous stroke of the scissors tool, keeping the blade just inside the seam allowance line.
-
Pause at corners and rotate the paper template rather than dragging the scissors across the corner, because sharp angles are the most common place to nick the allowance.
-
Lift and re-seat the scissors if the path wobbles more than a few pixels, since correcting a jagged edge mid-trace tends to compound the error.
-
Confirm the cut by clicking outside the template; the engine will flash red on any segment that falls outside the allowance.
Players who follow this loop consistently report a near-zero redo rate on simple commissions, because the slow first pass prevents the mistakes that would otherwise force a second cut. According to community testing on the Steam discussion boards, the biggest first-week complaint is players trying to cut at full speed before they have learned the cornering step.
Common Cutting Mistakes and How to Spot Them
Three mistakes show up over and over in new-player sessions: cutting outside the seam allowance, rotating the template mid-cut, and skipping the corner pause at 90-degree angles. Each one has a visible warning sign you can catch before committing fabric—because once the scissors finish their arc, that scrap of cloth is gone, and the commission timer keeps ticking whether you like it or not. Recognizing these three early is the foundation of clean grain line alignment and reliable pattern layout, the two habits that separate a passing dressmaker from a five-star one.
| Mistake | Warning Sign | Fix |
|---|---|---|
| Cutting outside seam allowance | Red glow on the traced path | Undo and re-trace inside the dashed line |
| Rotating the template mid-cut | Piece no longer aligns with grain arrow | Cancel cut, re-snap template, restart |
| Skipping the corner pause | Jagged 90-degree corner on the panel | Re-cut from the last clean checkpoint |
The red-glow warning is your friend: it does not block the cut, it just flags it. Players who treat the warning as a hard fail end up with cleaner panels than those who click through it, and that habit pays off as the commissions get longer and the templates more intricate.
Pattern Layout: Packing Pieces to Save Fabric
Layout is where Dressmaker stops feeling like a tracing exercise and starts feeling like a puzzle. The pattern template does not care where it sits on the mat, but the player's fabric budget absolutely does. A smart layout puts every panel on a single layer of fabric with no overlap and minimal gaps, while a careless one can double the fabric cost of a single commission.
The Three Layout Patterns That Cover Most Gowns
Most gowns in the game are built from three to seven panels, and three layout patterns handle the vast majority of them. The straight layout stacks pieces in a single column along the lengthwise grain and works for fitted bodices and narrow skirts. The staggered layout offsets alternate pieces so the curves of one nest against the straight edges of the next, which is ideal for bell-shaped sleeves and A-line skirts. The rotational layout spins select pieces by 90 or 180 degrees, which is the only way to fit a circular skirt or a flared overskirt without leaving a hole in the middle of the fabric.
| Layout | Best For | Fabric Waste | Skill Required |
|---|---|---|---|
| Straight | Bodices, fitted panels | Low | Beginner |
| Staggered | Sleeves, A-line skirts | Medium | Intermediate |
| Rotational | Circular skirts, overskirts | Low when done right | Advanced |
For a longer walkthrough on the staggered and rotational layouts, the pattern arrangement tutorial shows how to mirror left and right bodice panels so their grain arrows still run parallel, pair circular overskirt wedges by rotating them 180° around the fabric's center point, and pack tight clusters without crossing grain boundaries.
Grain Line Alignment in Multi-Piece Layouts
Every piece in a layout carries its own grain arrow, and they do not all have to point the same direction. A bodice typically sits on the lengthwise grain for structure, while a circular skirt panel needs the bias for drape. The trick is to read the arrows before placing the first piece, because once the first panel is down, the rest of the layout has to work around it. Players who plan all grain directions on a scrap of paper before opening the cutting mat finish multi-panel gowns faster than those who improvise piece by piece.
Saving Fabric for the Next Commission
A layout that wastes 10 percent of a cotton panel feels tolerable on a single commission, but it compounds fast across a week of orders. Three habits keep waste under control: leave the largest scrap in one connected piece rather than slicing around every gap, keep the selvage edge clean so the leftover panel can still be sold off the rack, and reserve a dedicated "scrap zone" at the edge of the mat for tiny offcuts that can become appliqués or hem trims later. Players who run their mat this way report noticeably steadier coin income by the second in-game week.
Bias Cutting Explained and When to Use It
Bias cutting is the one technique that separates passable gowns from showstoppers, and it is also the one that wastes the most fabric when done wrong. A piece cut on the bias drapes more fluidly, hugs the body without darts, and produces the soft folds that define formal evening wear. The cost is that a bias cut uses roughly 30 percent more fabric than the equivalent straight cut, because the piece has to be rotated away from the most efficient grain direction.
When Bias Cutting Pays Off
Three commission types justify the extra fabric cost. Formal evening gowns, especially those with circular or flared skirts, look noticeably better on the bias because the drape is what the customer is actually paying for. Couture pieces that need a sculpted silhouette, like a fitted bodice with a sweetheart neckline, also benefit from bias placement because the fabric molds to the body instead of fighting it. The third case is decorative trim, where a bias-cut strip curls naturally into a ruffle or rosette without ironing.
When to Skip the Bias
Every other commission should be cut on the straight or cross grain. Casual day dresses, work uniforms, and children's outfits all look better with the structure of a lengthwise cut, and the fabric savings add up over a busy week. The bias is a tool, not a default, and players who treat it as one consistently post higher coin totals than those who reach for it on every commission.
For a fabric-first perspective on when each grain direction makes sense, the bias cut fabric guide pairs well with this section and breaks down which of the five named fabrics hold up best at a 45-degree angle.
A Quick Decision Tree for Grain Direction
Use this table as a fast reference when a commission lands on the workbench, but read it as a pattern layout map rather than a list of rules: every entry pairs a garment element with its recommended grain line alignment, so the bias cut for a couture bodice or a circular skirt explains why the hem ruffle below it can curl without ironing, and the lengthwise grain for a structured bodice is the same reason a fitted sleeve keeps its crisp cap. Trace the column downward and the relationships between dressmaker pattern pieces start to click, turning a quick scan into a genuine dressmaker pattern guide check before you cut.
| Garment Element | Recommended Grain | Why |
|---|---|---|
| Bodice (structured) | Lengthwise | Holds shape, supports seams |
| Bodice (couture) | Bias | Molds to body, soft edges |
| A-line skirt | Crosswise | Softer drape than lengthwise |
| Circular skirt | Bias | Needs fluid drape for flare |
| Sleeve (fitted) | Lengthwise | Crisp cap, clean cuff |
| Sleeve (bell) | Crosswise | Lets the flare hang naturally |
| Hem ruffle | Bias | Curls without ironing |
Memorizing the first three rows of that grain line alignment table — structured bodice on lengthwise, couture bodice on bias, A-line skirt on crosswise — gets you through the first week of cutting real dressmaker pattern pieces without second-guessing. Once you have sewn one of each and felt the difference a bias-cut circular skirt makes against a crosswise A-line, the remaining rows (sleeves, ruffles, bell flares) click into place because the underlying rule repeats: grain choice controls drape, and drape controls every finished silhouette in your dressmaker pattern layout.
A Repeatable Cutting Routine From Sketch to Sew
The habits described above only matter if you actually use them on every commission, and the easiest way to do that is to fold them into a single repeatable workflow. The loop below is the one most veteran players fall into by the end of their first in-game week, and it can be run start to finish in under九十 seconds once it is muscle memory.
| Step | Action | Time | Output |
|---|---|---|---|
| 1 | Read the request brief and note the customer's preferred silhouette | 10s | One-line plan |
| 2 | Open the sketchbook and pin the matching paper pattern template | 10s | Template selected |
| 3 | Check grain arrow, size marker, and seam allowance | 10s | Three-point pass |
| 4 | Place the first panel on the lengthwise grain | 15s | Anchor panel down |
| 5 | Arrange remaining panels using staggered or rotational layout | 20s | Layout complete |
| 6 | Cut each panel with a slow first pass, pause at corners | 20s | Clean cuts |
| 7 | Preview on the mannequin and adjust if any panel twists | 10s | Fit confirmed |
Players who run this seven-step pattern workflow consistently see measurable upside by the second in-game week, with fewer redo commissions, steadier fabric budgets, and noticeably higher customer satisfaction scores. The grain line alignment check at Step 3 and the staggered panel layout at Step 5 are the two steps that most directly drive the payout bump, because they prevent the pattern template from twisting on the lengthwise grain and eliminate the wasted-yardage penalties that drag down your per-commission margins.
Common Workflow Pitfalls to Avoid
The most common deviation from this loop is skipping step three because the player feels confident. Confidence is fine, but the three-point check is faster than the redo it prevents, and it costs nothing. The second pitfall is treating layout as a single step rather than a planning step followed by an execution step; players who plan the layout on paper first finish faster than those who drag templates around the mat one at a time. The third is forgetting the mannequin preview, which catches roughly one in five cutting errors that the template check cannot.
How This Loop Scales to Late-Game Commissions
Late-game commissions in Dressmaker use the same loop with two additions: more panels per gown, and stricter satisfaction scoring. The workflow above absorbs both changes because it is built around planning, not speed. A seven-panel gown takes longer per step, but the structure is identical, which means the loop does not have to be relearned when the commissions get harder. According to the official Dressmaker page on Steam, the game's core loop is the same from the first cotton shift to the final royal commission, and players who internalize that loop early have a much easier time scaling up.
Practical Pattern Templates and Reusable Stencils
Dressmaker ships with a generous library of paper pattern templates, and most players never use more than a dozen of them. The trick is to learn which templates earn their keep across a typical week and which only come out for specialty commissions.
Templates Worth Mastering First
Three templates cover more than half of the commissions in a normal week. The fitted bodice template is the foundation of nearly every dress, and it cuts cleanly on the lengthwise grain with minimal waste. The A-line skirt template pairs with the bodice for the most common two-panel gown, and it is the best template for practicing a staggered layout. The bell sleeve template rounds out the trio and is forgiving enough for new players to cut without wasting fabric.
| Template | Pairs With | Best Layout | Difficulty |
|---|---|---|---|
| Fitted bodice | A-line skirt | Straight | Beginner |
| A-line skirt | Fitted bodice, bell sleeve | Staggered | Beginner |
| Bell sleeve | Fitted bodice | Staggered | Beginner |
| Sweetheart neckline | Fitted bodice | Straight | Intermediate |
| Circular overskirt | Fitted bodice | Rotational | Advanced |
For a deeper dive on the three core templates and the way they interact with the cutting mat, the pattern layout guide walks through the same trio with a focus on commission satisfaction. There, the straight layout is shown producing zero scrap on the 24-cell mat for the fitted bodice paired with the A-line skirt, while the staggered bell sleeve layout leaves two usable offcuts that can be re-rolled into sweetheart neckline panels, which is why most players graduate to the intermediate table above only after internalizing those grain line alignment savings first.
Building a Personal Template Library
Players who run multiple in-game weeks eventually stop reaching for the full template catalog and start curating a personal library of the pieces that actually fit their shop's brand. A formal-leaning shop might stock sweetheart necklines and circular overskirts, while a casual shop keeps more daywear templates in rotation. Curating the library is also a coin strategy: templates that match the shop's brand convert into commissions faster, because customers whose briefs align with the shop's specialty walk in more often than the engine's average roll would suggest.
Where Pattern Templates Come From
The free Dressmaker press kit from Free Lives confirms the developer drew inspiration from real-world dressmaking, and the in-game template catalog reflects that lineage. Templates unlock as the shop levels up, with the fitted bodice, A-line skirt, and bell sleeve available from the first commission and the more advanced circular and couture pieces arriving in the mid-to-late game. Players who want to plan a long-term shop should map their template unlocks to their commission mix, rather than unlocking everything at once and ignoring the templates that do not fit their customer base.
Frequently Asked Questions
What is the fastest way to learn the Dressmaker pattern guide basics?
Focus on the three core templates — fitted bodice, A-line skirt, and bell sleeve — and run every early commission through them. The fitted bodice teaches grain alignment, the A-line skirt teaches staggered layout, and the bell sleeve teaches cornering on the scissors. Once those three feel automatic, the rest of the catalog is variations on the same habits.
How do I stop wasting fabric when cutting patterns?
Plan the layout on a scrap of paper before placing the first template on the mat, and read every grain arrow before cutting. The two habits together account for roughly 80 percent of the fabric savings reported by experienced players, because they prevent both the wrong-grain mistake and the scattered-piece mistake in a single pass.
Can I rotate a pattern template to fit it on the fabric?
Only if the grain arrow still points along the correct fabric axis. Rotating the template for fit is fine when the rotation matches the grain direction the piece requires; rotating it to chase leftover fabric produces twisted seams and rejected mannequins. Treat the grain arrow as a hard constraint, not a suggestion.
Do I need every pattern template unlocked to finish the game?
No. The three core templates cover the majority of commissions, and the rest of the catalog is specialty work for specific briefs. Unlocking templates as they become relevant to your shop's commission mix is faster and cheaper than chasing every unlock, because each new template arrives with a small coin cost that adds up quickly if you buy them all at once.
Where can I see real player examples of pattern layouts?
The Steam community guides hub currently lists only a handful of entries, mostly early-game tip lists and Russian localization projects, so visual examples are still sparse at launch. Watching a streamer run a single commission end to end is the closest substitute, because the layout choices and grain decisions show up clearly in a recorded session.