
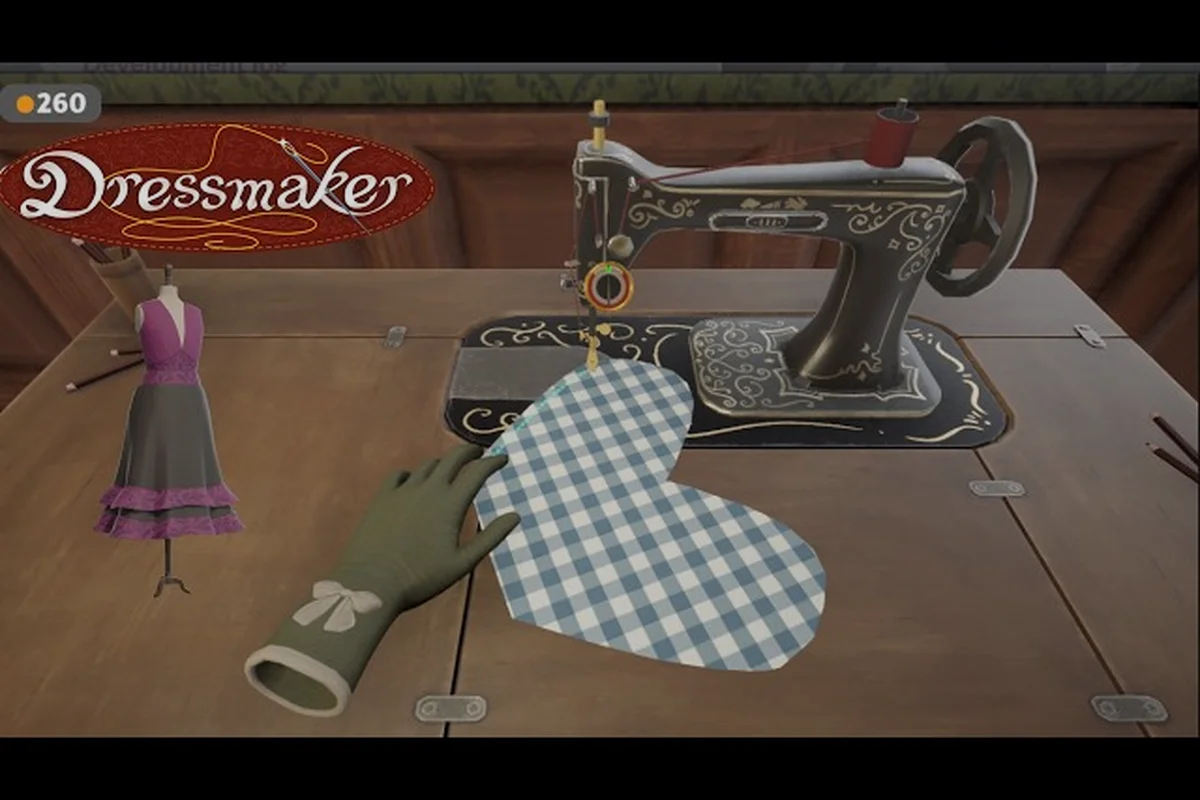
The Dressmaker scissors tool sits at the center of every clean panel you feed into the sewing machine, and a single sloppy cut can ruin the fabric layout you spent minutes arranging. Players who treat the scissors as a precision instrument rather than a button-mash action consistently deliver garments that match the mannequin preview, which translates directly into happier customers and steadier income. This guide breaks down how the dressmaker scissors tool works, when to switch to a rotary cutter, how to manage seam allowance, and how to shape darts, pleats, gathers, and hems without the fraying edges that drag a commission's quality down. income. This guide breaks down how the dressmaker scissors tool works, when to switch to a rotary cutter, how to manage seam allowance, and how to shape darts, pleats, gathers, and hems without the fraying edges that drag a commission's quality down, while the companion Dressmaker Pattern Layout Guide walks through grainline direction, notching, and pattern-piece placement so the cutting choices you make here line up cleanly with a well-prepared pattern.
How the Scissors Tool Works in Dressmaker
The scissors tool in Dressmaker is a guided cutting action that snaps to the outline of whatever paper pattern piece you have selected in the sketchbook. Once you lock a pattern piece to a fabric swatch on the cutting table, dragging the scissors along the grid traces a path, and the game rewards clean, connected strokes with a tight edge tolerance. Rushed or jagged strokes leave visible wobble on the cut panel, which the sewing machine then highlights as an imperfect edge.
According to the Dressmaker on Steam store page, the full making loop runs from sketchbook to mannequin preview, and the cutting step is the bridge between design and construction. Five named fabrics (cotton, linen, wool, silk, velvet) each behave slightly differently under the scissors, so the same clean stroke can produce sharper results on cotton than on velvet, where the lofted weave hides minor edge wobble but punishes you for cutting against the grain.
Scissors vs Rotary Cutter
The dressmaker scissors tool is best for curved seams, notches, and pattern pieces with deep armholes or sweetheart necklines, because the angled blade follows organic curves without flattening the fabric. The dressmaker rotary cutter, on the other hand, rolls in a straight push and excels at long, ruler-guided edges such as side seams, hem allowances, and rectangular skirt panels.
| Cutting Tool | Best For | Edge Precision | Risk on Slipped Stroke |
|---|---|---|---|
| Scissors tool | Curves, notches, necklines | High on tight curves | Jagged wobble shows on the cut panel |
| Rotary cutter | Long straight edges, hem folds | Very high with ruler guide | Fabric shift ruins multiple panels at once |
| Snips (manual) | Thread cleanup, dart points | N/A | Not a primary cutting tool |
Players who use the rotary cutter for every straight pass and reserve the scissors for curves cut their average pattern time noticeably, because the rolling action never lifts the fabric off the table. The free-lives press release describes the game as grounded in real-world dressmaking, and this real-world split between shears and rotary cutter is reflected directly in the two control options.
Cutting Speed vs Edge Quality
Holding the mouse button longer does not speed up the cut; the scissors tool is rate-limited by the game's animation cycle, and mashing the trigger just restarts the cut animation. A slower, deliberate stroke that traces the full pattern outline in one motion produces cleaner edges than several fast partial cuts, because each restart introduces a tiny offset where the strokes meet. Community testing in the Steam discussion threads shows that players who slowed down to one continuous stroke per edge reduced their visible-edge-defect count compared to faster but choppier attempts.
Pattern Matching and Fabric Alignment
Pattern matching is the step where you align printed or directional fabrics so the motifs line up across seams, and the dressmaker pattern matching workflow is built around the grid that appears on the cutting table. Each pattern piece shows a grain line arrow, and rotating the piece on the grid rotates the visible print, which lets you preview how a motif will sit on the finished panel before you commit to a cut.
Grain Line and Bias Cuts
The grain line arrow points along the warp threads of the woven fabric, and aligning the arrow with the table grid keeps the panel stable after washing. A 45-degree rotation puts the pattern on the bias, which produces a softer drape on silk and velvet but adds stretch that complicates later sewing. Most beginner commissions stay on the straight grain because customers rarely specify bias work, and the off-grain panels are easier to feed through the machine without distortion.
| Fabric | Straight Grain Result | Bias Cut Result | Recommended Use |
|---|---|---|---|
| Cotton | Crisp, stable panels | Slight stretch, warps when washed | Straight grain for shirts and casual dresses |
| Linen | Textured, holds shape | Drapes softer, wrinkles visibly | Straight grain for summer dresses |
| Wool | Warm, structured | Floppy, loses body | Straight grain for coats and tailored pieces |
| Silk | Smooth, slight sheen | Liquid drape, clings | Bias for evening gowns, straight for blouses |
| Velvet | Plush pile, light catches | Pile shifts, color changes | Straight grain for collars and cuffs |
Aligning Prints Across Panels
When you cut two panels from the same printed fabric, the pattern matching grid in Dressmaker shows a ghost outline of the previous cut, so you can slide the second panel until the motifs align with the first. This is especially important for floral and striped cottons, where a one-centimeter offset between front and back bodice pieces is visible at the seam. Players who ignore the ghost outline often finish a garment only to find the print climbs diagonally across the body, which costs the satisfaction bonus even when the stitching itself is clean. The Dressmaker Press Kit - Free Lives confirms the title was built to be approachable without prior dressmaking knowledge, but the matching grid rewards players who take a few extra seconds per panel.
Seam Allowance and Edge Precision
Seam allowance is the strip of fabric between the stitch line and the raw cut edge, and the dressmaker seam allowance setting in the sketchbook controls how wide that strip is before you cut. A wider allowance gives you room to let out a seam if a panel is slightly too small, while a narrower allowance produces a cleaner finished garment but leaves no margin for error.
| Garment Type | Recommended Allowance | Reason |
|---|---|---|
| Casual cotton dress | 1.0–1.2 cm | Standard room for fitting adjustments |
| Formal silk gown | 0.6–0.8 cm | Clean finish, minimal bulk at the seam |
| Wool coat | 1.3–1.5 cm | Heavy fabric needs more to press open flat |
| Velvet accent panel | 0.8–1.0 cm | Avoid crushing the pile under a wide allowance |
| Lined bodice | 1.0 cm | Matching seam lines between shell and lining |
A common mistake is leaving the default allowance on every commission, which produces bulky seams on silk and tight, hard-to-press seams on wool. Switching the allowance to match the fabric before you cut the first panel saves you from re-cutting an entire layout when the stitched garment comes out misshapen. Players who take the extra minute to confirm the seam allowance setting per commission report fewer rejected pieces in the shop window.
Pressing Seams Open vs To One Side
After the machine sews a seam, the allowance can be pressed open (flat against the table, both sides spread) or to one side (tucked under the deeper layer). Open pressing is cleaner on lightweight fabrics because it reduces bulk, while pressing to one side gives a stronger finish on stress points such as armholes and crotch seams, where an open seam could fray with wear. In the game, the ironing mini-game responds to how you set the seam before pressing, and matching the press direction to the fabric weight keeps the finished garment flat on the mannequin.
Darts Explained and Shaped Correctly
Darts are triangular folds of fabric that shape a flat panel to the curves of the body, and the dressmaker darts explained workflow starts in the sketchbook where each pattern piece shows dart legs as dotted lines converging at a point. Sewing along those lines while the fabric is still flat, then pressing the fold toward the center, creates the shaping that turns a rectangle into a fitted bodice.
Bust, Waist, and French Darts
The most common darts in the game are the bust dart (slim, points toward the apex), the waist dart (deeper, removes width at the waistline), and the French dart (a diagonal line from the side seam to the bust, used in one-piece bodices). Each dart has two legs that must meet exactly at the dart point, because a gap leaves a visible pucker and a crossing point creates a tiny pleat the mannequin will highlight.
| Dart Type | Position | Effect | Common Garment |
|---|---|---|---|
| Bust dart | Side seam to apex | Adds cup shaping | Fitted blouses, princess dresses |
| Waist dart | Side seam to waist center | Cinches the silhouette | A-line skirts, shirtwaist dresses |
| French dart | Side seam to upper bust | Diagonal shaping without a seam at the center front | One-piece bodices, wrap dresses |
| Double-point dart | Two points on a single fold | Shapes shoulders and waist in one dart | Tailored jackets, fitted gowns |
When you sew a dart in Dressmaker, the line you trace on the sewing machine should start at the wide leg, taper to the point, and continue off the edge of the fabric for the last few stitches. This locks the dart point so it does not unravel, which is the same technique real tailors use, and the game's sewing machine mini-game grades the result based on whether you reached the point before lifting the presser foot.
Pleats, Gathers, and Hem Finishes
Pleats, gathers, and hems are the three finishing techniques that turn a sewn shell into a wearable garment, and each one has a specific control in the dressmaker interface. Pleats are folded, gathers are pulled, and hems are folded under and stitched, and the dressmaker pleats and gathers workflow rewards you for matching the fold depth to the fabric weight.
Knife, Box, and Inverted Pleats
A knife pleat folds in one direction, a box pleat shows two folds facing away from each other (like a folded cardboard box), and an inverted pleat shows two folds facing each other. Knife pleats read cleanly on lightweight fabrics, box pleats give structure to wool skirts, and inverted pleats add hidden volume to silk gowns. Setting the fold depth in the sketchbook determines how much fabric each pleat consumes, and the grid in the cutting step previews the spacing so you can verify the pleats land symmetrically on the finished panel.
| Pleat Type | Visual Effect | Best Fabric | Use Case |
|---|---|---|---|
| Knife | One-directional folds, sharp edges | Cotton, linen | Schoolgirl skirts, casual pleats |
| Box | Symmetric outward folds | Wool, heavy linen | Tailored skirts, kilts |
| Inverted | Hidden folds, hidden volume | Silk, satin | Evening gowns, formal wear |
| Accordion | Tight, even folds | Lightweight cotton, synthetic | Decorative trim, sunray pleats |
Gathering and Hem Allowance
Gathering is created by sewing a long running stitch along the seam line, then pulling the bobbin thread to bunch the fabric into even folds. In the dressmaker hem guide workflow, gathering is most common at waistlines (to attach a skirt to a bodice) and at sleeve caps (to set the sleeve into the armscye). Even gathers require consistent stitch length, and the sewing machine mini-game shows a tension meter that drops if your stitches vary, so slowing the feed produces tighter, more uniform gathers.
The hem itself is the final fold at the bottom edge of a skirt, sleeve, or pants leg, and the dressmaker hem guide recommends a double-fold hem for most commissions, where the raw edge is folded under once to hide the cut, then folded under again and stitched. A double-fold hem is stronger than a single-fold because the raw edge is fully enclosed, and the game rewards you with a higher finish score when the second fold completely covers the first.
Putting It All Together: A Cutting Workflow
A clean cutting workflow follows the same order every commission: pick the pattern, set the seam allowance, align the grain, trace the outline with the right tool, then double-cut notches and darts. The dressmaker scissors tool handles curves, the dressmaker rotary cutter handles long edges, and matching the tool to the edge type is the single biggest quality lever you control before the sewing machine even starts.
| Workflow Step | Tool | Common Mistake to Avoid |
|---|---|---|
| Set seam allowance | Sketchbook setting slider | Leaving default on silk produces bulky seams |
| Align grain line | Cutting table grid | Off-grain panels warp after the first wear |
| Trace curved edges | Scissors tool | Mashing the button creates jagged strokes |
| Cut long straight edges | Rotary cutter | Cutting without a ruler shifts the fabric mid-stroke |
| Notch dart points | Scissors tool, short snip | Skipping the notch loses the fold reference later |
| Verify alignment | Ghost outline on next panel | Ignoring the ghost offset ruins print matching |
Players who work this checklist into the first minute of every commission consistently hit the quality threshold for premium customer requests, because the panel edges arrive at the sewing machine already accurate. Once the panels are cut cleanly and the darts, pleats, and hems are pressed in the right direction, the rest of the commission flows through the machine without rework.
Frequently Asked Questions
When should I use the dressmaker rotary cutter instead of scissors?
The rotary cutter is best for long, straight edges such as side seams, hem folds, and rectangular skirt panels where the rolling motion never lifts the fabric. Reserve the scissors tool for curves, notches, and dart points, where the angled blade follows organic shapes without flattening the lofted weave of velvet or the drape of silk.
How do I set the right seam allowance for each fabric?
Match the allowance to the fabric weight before you cut the first panel. Cotton and linen handle a 1.0–1.2 cm allowance, silk and velvet do best at 0.6–1.0 cm, and wool benefits from a wider 1.3–1.5 cm allowance so the seam can be pressed open without bulk.
What is the best way to shape darts in Dressmaker?
Sew each dart from the wide leg to the point, taper the stitch length as you approach the point, and continue a few stitches off the edge of the fabric to lock the fold. Press the dart toward the center of the garment on the ironing step, and the shaping will sit flat on the mannequin.
How do I make even pleats and gathers?
Set the fold depth and spacing in the sketchbook so the grid previews the layout, and keep the stitch length consistent when you sew the gathering line. Pull the bobbin thread slowly to bunch the fabric into even folds, and check the tension meter on the sewing machine mini-game to confirm the gathers are uniform.
What is the cleanest hem finish for a formal gown?
A double-fold hem is the cleanest finish for a formal gown, because the raw cut edge is fully enclosed inside the second fold. Press the fold flat with the iron before stitching, and the hem will sit invisibly against the skirt with no visible bulk on the finished silhouette.